Even the smallest leak can waste hundreds of litres of water if left unchecked, and toilets are no exception. While a leak might seem like only a minor annoyance, over time, those drips can really drive up your water bills.
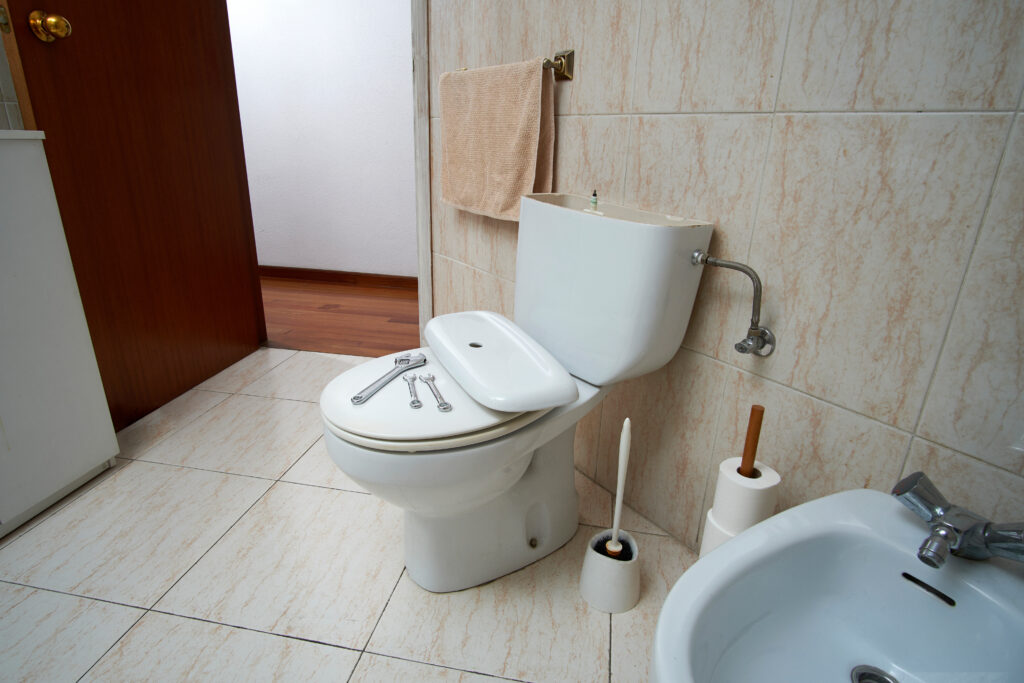
There are several reasons your toilet might be leaking, and each one usually calls for a slightly different fix. The good news is that in most cases, a leaking toilet can be fixed yourself with a few tools and a bit of know-how.
In this post, we’ll walk you through some of the most common causes, how to troubleshoot them and some of the signs it’s time to call in the professional plumbers. Whether you’re a confident DIYer or just trying to figure out what’s going on, you’ll find everything you need to stop the leak and save water.
How to Tell if Your Toilet is Leaking Into the Bowl
Did you know a leaking toilet can waste over 700 litres of water a day, especially if it goes unnoticed. In fact, if your toilet develops a leak, chances are that you may not realise until you’re hit with an unexpectedly high water bill!
Silent leaks are especially common and can go undetected for weeks or even months. These usually occur between the tank and the bowl, often due to a worn-out flapper or flush valve that isn’t sealing properly. You might notice that you have to hold the flush handle down longer than usual, or your toilet might flush on its own.
Fortunately, there are a few tell-tale signs that can help you catch a leak early, before it becomes a major problem.
- Water around the base: Puddles or dampness around the base could mean the wax ring seal has failed or the tank has cracked.
- Staining in the bowl: Brown or rusty streaks running down the inside of the bowl often indicate a constant drip of water.
- Unusual sounds: Hearing water running between flushes? That’s often a sign of valve issues or a fill mechanism that won’t shut off properly.
- Sewage smells: Persistent unpleasant odours can point to a leaking sewer pipe or damaged seal.
- Rusty hardware: Corrosion on the metal parts inside the tank suggests an ongoing leak, keeping things too damp.
- Spiked water bills: If your water bill suddenly increases with no change in usage, a hidden leak might be the culprit.
The Food Colouring Test
If you aren’t 100% sure if your toilet is leaking, you can try this test:
- Start with a clean toilet tank and bowl. Make sure no cleaning products are in the tank, as they might affect the result.
- Remove the tank lid and place it somewhere safe.
- Add 15–20 drops of food colouring into the water in the tank.
- Wait for 15–30 minutes without flushing.
- Check the bowl; if you see coloured water in the bowl without flushing, you’ve got a leak.
Why Your Toilet Keeps Leaking Into the Bowl
If your toilet keeps leaking into the bowl, identifying the root cause is the first, and most important step to fixing it. With a proper diagnosis, you’ll find the repair process much easier and more effective. Let’s look at the most common culprits behind this frustrating issue.
Worn-Out or Misaligned Flapper
The flapper is a rubber or plastic disk that sits at the bottom of the tank and creates a seal between the tank and the bowl. It’s one of the most common reasons for toilet leaks. Over time, flappers can become warped, cracked, or brittle, especially if you’re using in-tank cleaners or your water contains harsh chemicals. When the flapper can’t seal properly, water constantly leaks into the bowl.
Even a new flapper can leak if it’s not sitting correctly or if the chain attached to the flush handle is too tight or too loose.
Faulty Flush Valve Seat
The flush valve seat is the surface the flapper rests against to form a watertight seal. If this surface becomes corroded, scratched, or uneven, due to age or mineral buildup, water can sneak past the flapper even if it appears to be intact. You can usually feel these imperfections by gently running your finger around the seat. Even a small nick can cause continuous leaking.
Cracked Overflow Tube
The overflow tube prevents your tank from overflowing by redirecting excess water into the bowl. But if the tube develops cracks or becomes brittle (which often happens in older plastic models or from exposure to chlorine tablets), it can create a continuous leak. Instead of water flowing only when needed, it seeps into the bowl nonstop.
Fill Valve Issues
The fill valve controls how much water enters the tank after a flush. When it malfunctions, due to wear and tear, debris, or incorrect adjustment, you may hear a hissing sound or notice water constantly trickling into the overflow tube. This creates what feels like an endless flush cycle, wasting significant amounts of water.
Float Problems
The float (a ball or cup-style mechanism) monitors the water level inside the tank and signals the fill valve when to stop refilling. If the float is set too high, misaligned, or damaged, the tank may overfill, causing water to run continuously into the overflow tube and bowl.
Mineral Buildup on Seals and Valves
If you live in an area with hard water, mineral deposits can build up on your toilet’s internal components over time. This buildup can prevent the flapper from sealing properly or interfere with how the fill and flush valves operate. Even a small amount of scale or debris can create a leak that’s persistent and difficult to detect without a close look.
Safety First: Turn Off the Water Supply
Before you attempt any fixes or repairs on a leaking toilet, it’s crucial to shut off the water supply. This simple step can prevent accidental flooding, water damage, and unnecessary mess while you work.
How to Locate and Shut Off Your Toilet’s Water Supply
In most Australian homes, your toilet has its own dedicated shut-off valve. You’ll typically find it near the base of the toilet either on the wall behind or beside the tank. Look for a pipe running from underneath the toilet tank to the wall or floor, with a small oval-shaped knob or lever attached.
To turn off the water:
- Follow the water line from the tank to find the shut-off valve.
- Turn the valve clockwise until it stops.
- Avoid overtightening; this can damage the valve.
💡Tip: If you can’t see a valve behind the toilet, check inside the cistern under the tank lid. In some older homes or apartments, the valve may even be located under the bathroom sink.
How to Properly Drain the Tank Before Repairs
Once the water supply is off, you’ll need to drain the toilet tank to safely access the internal parts:
- Remove the tank lid and place it safely out of the way.
- Flush the toilet and hold down the handle to let as much water out as possible.
- Use a sponge or towel to soak up any remaining water at the bottom of the tank.
- Check the bowl too, excess water here might interfere with your repairs.
If the toilet continues to run after the water’s off, it could be a sign that the float arm is misaligned or the flush valve isn’t sealing properly.
Fixing Common Internal Leaks in the Toilet Tank
Now that you’ve shut off the water supply and drained your toilet tank, it’s time to roll up your sleeves and tackle those internal leaks.
1. Replace a Worn-Out Flapper
The flapper is one of the most common sources of leaks. After around five years, it tends to wear out or warp, allowing water to slowly leak into the bowl.
Here’s how to replace it:
- Disconnect the flapper chain from the flush handle lever.
- Unhook the old flapper from the side pegs of the overflow tube.
- Attach the new flapper by hooking its ears onto the same pegs.
- Reconnect the chain, leaving just a little slack (too tight or too loose will cause problems).
- Turn the water back on and give the toilet a couple of test flushes to ensure everything’s sealing properly.
Tip: If the chain is too tight, the flapper won’t close. Too loose, and it may get stuck under the flapper.
2. Adjust or Replace the Fill Valve
If your toilet is making a constant hissing sound or seems to be running non-stop, the fill valve could be the culprit.
- Start by removing the valve cap and rinsing the washer under cool water to remove mineral deposits.
- If the valve is still not working correctly, you may need to replace it.
- Shut off the water (if you haven’t already), detach the water line, and unscrew the lock nut at the base of the fill valve.
- Install the new valve according to the manufacturer’s instructions.
3. Realign or Replace the Float Mechanism
Your float (either a ball float or float cup) controls the water level inside the tank. If it’s not set correctly, your tank might overfill and leak into the overflow tube.
- For float cups: Adjust the water level by turning the adjustment screw—clockwise to lower the water level, counterclockwise to raise it.
- For ball floats: Gently bend the metal arm down to lower the level or up to raise it.
- Aim to set the water level about 2.5 cm below the top of the overflow tube.
4. Clean or Replace the Flush Valve Seat
The flush valve seat can develop mineral buildup that prevents a proper seal.
- Use steel wool or fine sandpaper to clean the seat gently.
- Wipe it clean with a damp cloth.
- If cleaning doesn’t solve the issue, consider using a repair kit that includes a new seat insert and sealant ring.
5. Fix an Overflow Tube That’s Too High or Cracked
A cracked or improperly sized overflow tube can leak water directly into the bowl.
- For small cracks, waterproof tape or super glue can provide a temporary fix.
- For larger damage, replace the entire tube. It should sit flush against the tank bottom and be trimmed so it’s about 1 inch lower than the top of the fill valve.
6. Fixing a Leaking Toilet Seal or Base
Loose tee bolts (located at the base of your toilet) can break the wax seal and cause leaks.
- Pop off the plastic bolt caps on either side of the toilet base.
- Gently test the bolts with your fingers—if they move, they’re too loose.
- Use a wrench to tighten the bolts evenly, alternating sides.
- Check if the toilet wobbles; if not, you’re good to go.
Caution: Don’t overtighten, as too much pressure can crack the porcelain.
7. Replace the Wax Ring (If Needed)
If tightening the bolts doesn’t stop the leak, your wax ring may have failed.
Here’s how to replace it:
- Turn off the water and drain the toilet.
- Remove the floor bolts and gently rock the toilet side to side to loosen it.
- Lift the toilet and set it on a towel.
- Scrape away the old wax ring and clean the flange thoroughly.
- Install a new wax ring and lower the toilet back into place, aligning it with the bolts.
- Press down with your weight to seal it, then reattach the nuts and caps.
Other Less Common Causes to Rule Out
If you’ve already checked the usual suspects, like the flapper, fill valve, and float, but your toilet is still leaking into the bowl, it might be time to dig a little deeper. While not as common, the issues below can still cause persistent leaks and are worth ruling out before calling in the pros.
1. Cracks in the Porcelain
Toilets may look tough, but they can develop hairline cracks in the bowl or tank, sometimes from impact, sudden temperature shifts, or even factory defects.
Here’s what to look for:
- Water beading on the outside of the tank or bowl
- Water levels are dropping unexpectedly
- The tank refilling without being flushed
- Pools of water around the same spot repeatedly
Hairline cracks above the waterline can usually be sealed with waterproof epoxy as a temporary fix. However, any crack below the waterline is more serious and can worsen over time. This usually means it’s time to replace the toilet altogether.
2. Incorrectly Installed Parts from Previous Repairs
Sometimes, past repairs, whether DIY or professional, can create new problems if parts were installed incorrectly or aren’t quite the right fit.
Common installation mistakes include:
- Flappers that don’t align properly or don’t fit your model
- Fill valves that are misaligned or mounted too high
- Gaskets that are the wrong size or not seated properly
- Flush valves that don’t seal well with the flapper
If your toilet started leaking after a repair, double-check the work. Compare the replacement parts to your toilet’s model specifications, and ensure everything lines up and moves freely.
3. Water Pressure Issues Affecting Toilet Performance
Unstable or extreme water pressure can wreak havoc on your toilet’s internal components. High pressure can put too much force on parts, leading to cracks or premature wear. On the other hand, low pressure can prevent your toilet from flushing correctly, which may cause lingering leaks or incomplete flushing cycles.
Telltale signs of water pressure issues:
- Water spurts or bursts from faucets when turned on
- Cracks in plastic toilet valves
- Inconsistent or weak flushing
- Toilet parts wearing out faster than expected
Installing a water pressure regulator can help protect your plumbing system by keeping pressure levels stable. This small addition can prevent internal damage and extend the life of your toilet parts.
When DIY Isn’t Enough, It’s Time to Call a Plumber
DIY toilet repairs can solve many common leaks, but not all of them. Sometimes, no matter how many guides you follow or parts you replace, the problem sticks around. Knowing when to put down the wrench and call in a licenced plumber can save you time, frustration, and damage down the line.
Signs Your DIY Fixes Aren’t Doing the Job
If you’ve made multiple repair attempts and your toilet is still leaking into the bowl, your toilet might be trying to tell you something. Here are a few red flags that suggest it’s time to get a professional involved:
- You’ve replaced key components like the flapper, fill valve, or wax ring, but the leak persists
- Strange noises (like hissing, running, or bubbling) continue after repairs
- Your water bill remains unusually high, even after fixes
- You’ve followed all the steps carefully, but nothing seems to work
- Leaks stop temporarily, then return a few days later
Persistent Leaks After Replacing Parts
When you’ve already swapped out the obvious problem parts and the issue still won’t go away, it could mean there’s a deeper issue within your plumbing system, such as:
- Cracks in hard-to-see areas like the trap or internal passages
- Sewer line issues causing backflow or drainage problems
- Poor venting that throws off pressure and affects flushing
- Hidden water pressure problems damaging internal components
Visible Damage or Structural Concerns
Some warning signs go beyond what a standard DIY repair can fix:
- Hairline cracks that extend below the waterline
- Toilets that rock or wobble even after tightening the base bolts
- Leaks that appear to come from inside the wall or under the floor
- Uneven or damaged flooring around the base of the toilet
- Water damage in nearby areas, like warped skirting boards, musty smells, or brown stains on ceilings below
Why a Plumber’s Tools (and Expertise) Matter
Professional plumbers bring more than just experience; they come equipped with specialised diagnostic tools to pinpoint and solve issues that are invisible to the naked eye:
- Pressure gauges to assess water flow and performance
- Pipe cameras to inspect hard-to-reach interior plumbing
- Moisture meters to detect hidden leaks behind walls or under floors
- Hydrostatic testing equipment to identify slow or underground leaks
Calling in a Plumber Can Save You Money in the Long Run
It’s tempting to keep troubleshooting on your own, but if your toilet keeps leaking despite your best efforts, calling a professional could actually be the more cost-effective choice. A qualified plumber can diagnose the issue properly, fix it for good, and help prevent further damage that might lead to bigger repair bills down the line.

Preventative Maintenance Tips to Keep Your Toilet in Top Shape
The best way to avoid surprise leaks and costly repairs is to stay ahead with regular toilet maintenance. With just a little effort and a few simple checks, you can keep your toilet running smoothly, extend its lifespan, and steer clear of the dreaded plumbing emergency.
How Often Should You Check Your Toilet?
Beyond regular cleaning, you should check your toilet at least twice a year. This is to ensure all components are functioning properly, catch any early signs of wear or leaks, and prevent minor issues from turning into costly repairs down the line. Regular inspections help maintain efficient flushing, conserve water, and keep your bathroom running smoothly without unexpected problems.
Keep Mineral Buildup in Check
If you live in a hard water area, mineral deposits can quietly wreak havoc on your toilet’s internal parts. Here’s how to stay ahead of it:
- Pour 1 cup of white vinegar mixed with water into the tank at least once a month. Let it sit for 30 minutes before flushing.
- Avoid using harsh chemical cleaners, which can degrade seals and rubber components.
- If scale build-up keeps returning, consider installing a water softener to reduce the amount of calcium and magnesium in your water.
Choose Quality Replacement Parts
It’s tempting to grab the cheapest flapper or fill valve on the shelf, but low-quality parts often wear out faster and lead to repeat repairs. It’s best to stick to genuine replacement parts that match your toilet model. Off-brand or ill-fitting components may seem like a quick fix, but they often create new leaks or affect performance. While reliable parts from trusted brands might cost a bit more upfront, they’ll save you money and frustration down the line.
Key Takeaways
Toilet leaks might seem like a minor inconvenience, but they can waste a surprising amount of water and lead to costly repairs if ignored. Many common leaks can be fixed with simple DIY methods, saving you time and money.
However, not all problems are as easy to solve, and some issues require the expertise of a professional plumber. Knowing when to set down your tools and call in the experts is just as important as mastering basic repairs.
At Hardie & Co Plumbing, our family-owned Sydney business is committed to providing fast, reliable, and stress-free toilet plumbing solutions for homes, businesses, and industrial clients. We don’t just stop leaks, we help you save water and keep your plumbing system running smoothly. Contact us today!